How To Install Over Concrete
Read all instructions before starting your project.
These instructions cover installation methods for flooring applied over concrete slabs. The recommended application to an aged concrete slab is to glue (Urethane adhesive only) flooring directly to the slab surface.
1. Select a starter wall. An outside wall is best; it is more likely to be straight and square with the room.
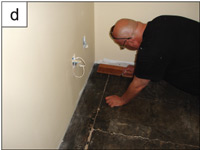
2. Measure out from the wall the width of 2 planks, plus an allowance of 13 mm (approx ½″) gap along the wall for expansion room for the flooring. Failure to allow a gap along all walls will result in future buckling of flooring. This gap is intended to be covered with the reapplication of the base and shoe moldings. Expansion room should be allowed along entire perimeter area of the room. (see fig. d)
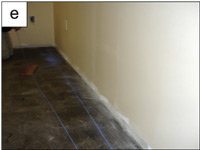
3. Snap a chalk line. (see fig. e)
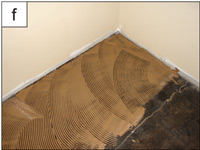
4. Spread Urethane Wood Flooring adhesive from chalk line to wall with a 1/8″ x 1/8″ square notch trowel. Do not use water based adhesive as it will add moisture to the flooring project, which may cause instability and other flooring issues. (see fig. f)
5. Most walls are not straight so set the flooring to the chalk line for straightness, remembering to allow 13mm (approx 1/2″) gap along wall for expansion.
6. Install the first row of starter planks (flooring groove should be facing the starter wall) and secure into position. Proper alignment is critical. Misaligned starter rows can ruin your installation. Professional installers sometimes firmly secure a straight edge along the chalk line (2x4’s work well), as a guide and to prevent planks from shifting in wet adhesive. Other installers prefer to install a few rows of flooring precisely laid straight, then allow to dry for several hours before proceeding. (be sure to scrape excess glue from the subfloor so that excess dried glue doesn't hinder installation of the remaining floor.) This method allows for a solid racking of the flooring for tightness without moving your starter rows around.
7. Use a scrap wooden tapping block to tap the planks until the tongue and groove snaps into place.
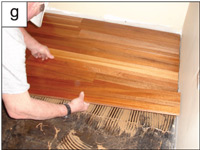
8. When the first 2 starter rows are secure, spread a 2-1/2 to 3 feet wide area of adhesive the length of the room. Avoid clustering end joints. Stagger random lengths so that end joints are no closer than 15 cm (approx 6 inches). (Never lay more adhesive than can be covered in 20 minutes. If the adhesive has set and will not transfer to the back of the plank, scrape up the adhesive and apply fresh layer.) (see fig. g)
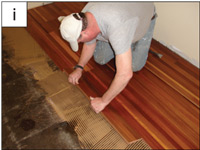
9. Place planks into position in wet adhesive and tap into place with a scrap wooden tapping block. (see fig. i)
10. After several rows of planks are installed, lay down perpendicular strips of masking tape (blue painters tape) to help hold the planks securely while the glue cures. Repeat this process as the installation progresses.
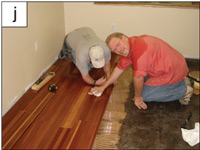
11. Check over installed area every few rows as it may be necessary to push flooring to close gaps. (see fig. j)
12. Retain a few planks in case a repair is ever required.
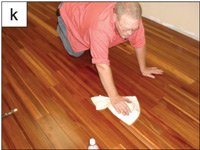
13. After every few rows, clean any adhesive accidentally transferred onto the finish surface of flooring planks with mineral spirits while still wet. (see fig. k)
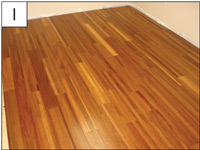
14. Peel up masking tape within 24 hours of installation. (see fig. l)
Final Inspection
After the floor is cleaned, reinspect the floor for nicks, scratches and planks that may have moved during installation or any other imperfections that need attention. In typical climates, floors can accept foot traffic within 8–12 hours. Arid climates may require more curing time.
Floor Protection During Construction
To protect the completed floor during construction, lay cloth painters tarps over the floor and tape them to the skirting boards. Never use plastic or polyethylene to cover the floor since they will trap moisture. Covering materials must allow the floor to breathe.